Many people ask me questions like: How do I get my photos from my phone to my computer? How can I easily transfer my files? What is the cloud? Many of these questions can be answered by understanding what many people now refer to as cloud storage. Rather than placing a picture of a cloud and writing data in the middle, I decided to provide a realistic analogy to help you conceptualize the cloud. The best way I can think of to explain how to do that is to think of the cloud as a storage unit. When you lease a storage unit, you place things into that unit and place a lock on the door, keeping your things safe and reasonably secure. If there is something in the storage unit that you want to share with another person you can give them the key to the storage unit allowing them access to the things contained within. The point to this example is to keep in mind that cloud data is/are kept off-site (not located on your computer or device), and you have the ability to share access to the cloud data.
How do I get my photos from my phone to my computer? How can I easily transfer my files? What is the cloud?
Having the ability to share access to cloud data can be extremely useful; not necessarily for the sake of giving other people access to your data but for moving data to other devices. Now here is the second part of the analogy that seems to be the most confusing. Going back to the storage unit example, think about the key that’s required to unlock the bolt and gain access to the things contained within the storage unit. Imagine that the key being used to open and close the storage unit is contained within a device such as a laptop, pc, or handheld device (mobile phone/tablet). In other words, I can create an environment where my smart phone, my laptop, and my PC all have access to the same cloud storage or, thinking in terms of our example, storage unit.
But why do I want my phone to have access to the cloud? There are several answers to this question, and the right answer is going to depend on what data is/are being accessed and why it is being accessed. For instance, if you use your smart phone to take pictures then you could chose to store those pictures into the cloud so that you can access them from your laptop or PC to store, share, or print them later. Most people will use this technology so that they can email or post photos to share with distant relatives. While many smart phones will allow you to do this directly from the phone, it can be extremely cumbersome to do this when you have an entire album of pictures that you want to share. Further, some people like to edit there photos on their computer using free photo software like Google Picasa.
Cloud Service Options
To utilize this technology you need access to cloud storage through a provider. Your options will be different depending on what device you are using. There is a digital divide between Google Android and Apple iOS that you will need to consider.
Android/Apple Users
If you have both Android and Apple devices and wish to share data between them, then I suggest that you use Dropbox. You can download the Dropbox app on both the Google Play Store on Android and the Apple Store on iPhone by searching for “Dropbox.” The service offers 2 GB of space for free, which will hold approximately 1,000 high resolution pictures. If you find that you need larger quantities of space, you can sign up for premium services with them.
Android Users
Dropbox is still a good solution even if you don’t own any Apple devices, but there are other options that might be a better solution. Google Drive, for instance, is a cloud service provided by Google, which provides 15 GB of space for free. You can find Google Drive by typing “Google Drive” into the Play Store search dialog box. As with Dropbox additional space can be obtained through premium membership.
Apple Users
You might still want to consider using Dropbox, because Apple’s cloud storage service, iCloud, requires that you use an iOS or OS X device (Apple Computer or iPhone/iPad/iPod). In other words, an iPhone or iPad would be able to access the storage but a PC (non-Apple device) would not be able to access the storage. This may not be a good solution because many iPhone owners use a PC as opposed to an iMac or equivalent Apple made computer.
On the other hand, if you are that pure Apple user, then iCloud would be the optimal choice because it seamlessly integrates with all of your Apple devices. With iCloud you receive 5 GB of storage for free, and additional storage space can be obtained through premium membership.
Special Note: Most Apple products do not behave well with non-Apple products.
Using the Cloud
Once you have decided on which cloud service is best for you and installed it on your device then you are ready to start using the cloud. Here is a list of the three recommended services:
Special Note: This article will focus on using Dropbox since it works on all devices.
Dropbox
Once you have installed Dropbox from the Google Play Store or App Store, find the Dropbox app in your list of apps.
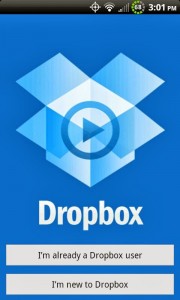
Once you have found and opened the app you should be presented with a screen that looks something like the image below.
If you have not yet created a Dropbox account, then click “I’m new to Dropbox,” and follow the instructions to create a new account. If you prefer, you may create the account on your laptop or computer using the website by visiting Dropbox.com.
If you already have a Dropbox account or have decided to signup using your laptop or computer then click “I’m already a Dropbox user,” and follow the instructions on entering your username and password into the app. Your username should be the email address that you have associated with the account.
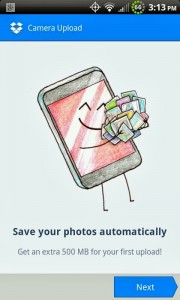
Dropbox, like Google Drive and iCloud has an option to upload your pictures automatically. You will be presented with this option once you log in to app for the first time. See the images below.
If you do not wish to have your photos automatically uploaded to your Dropbox folder then select “Skip.” You will still be able to put certain photos into the Dropbox folder (continue reading).
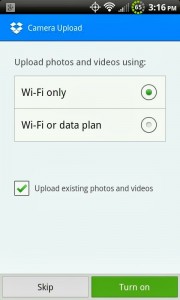
Warning: Selecting Wi-Fi or data plan will use your cellular data plan and can rack up charges.
If you would like to have all of your photos automatically uploaded then you will want to select “Turn on,” but before you do, you need to choose how you want them uploaded. By default, “Wi-Fi only” is selected. I recommend that you leave this setting the way it is. In other words, your photos will only sync when you are connected to a wireless network, such as a home internet connection or Wi-Fi network that you have been given access. If you select the “Wi-Fi or data plan” option then you are telling Dropbox that you want it to use your cellular data plan to transfer the images while you are away from a wireless network. This can rack up data charges if you do not monitor your data usage carefully. I strongly recommend that you do not use this option unless you have unlimited data.
Below the Wi-Fi option there is a checkbox that is checked by default that says “upload existing photos and videos.” If you leave this checked Dropbox will scan your smart phone for any photos and videos and put them in your storage.
For me personally, I decided to skip this because I don’t necessarily want every picture I take to be uploaded to my cloud storage. If you decided not to skip the auto-upload feature, then you can jump to the section "Laptop/Computer" on the bottom of this post, which explains the process of accessing your photos on your laptop or computer.
Suppose you have a particular image or group of images that you want to copy to your cloud storage. Now this is going to vary depending on the type of device you are using. Please read the instructions that correspond to your device.
Android
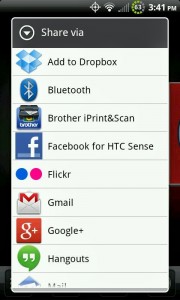
If you are using an Android device, you want to select “Gallery” from your list of apps, which will take you to all of the pictures and videos on your phone. Once you see you images and videos select the share icon (see below).
Once you select the share icon a dialog box should appear with a list of options to share the image. Among those options, you should see “Add to Dropbox.”
After selecting “Add to Dropbox” you will be returned to your photos. Notice that there is now a transparent checkbox in the corner of each picture/video. Find the images and videos that you want to store and select the transparent checkbox for each file. Once you have found all of the files that you wish to store select “next” to move on to the next step.
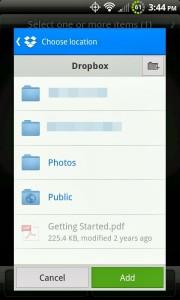
Next you will see a Dropbox dialog box appear. You have the option to place your images or videos into a particular folder. I recommend that you select the folder called “Photos.” If you would like to create a new folder you can do so by selecting the grayscale folder icon in the top right corner of the Dropbox dialog box. You will be prompted with a text entry field to specify the name of your folder if you decide to go that route. It really is not important where you save the images because you can reorganize your files once you the images and video are stored into your Dropbox account.
To initiate the transfer select “Add” and your images will be put into your Dropbox account in the background.
Special Note: If you selected Wi-Fi only in the previous step, then your phone will upload the files once you are connected to a wireless network.
Apple
For Apple devices, you will want to open the Dropbox app and select the folder for your images and video. As I stated in the Android instructions, it is not important where you save your files because you can move and organize them later on your laptop or computer. Select the plus icon on the top right corner of your screen and then select the “existing photo or video” button that appears on the bottom of the screen. You will be taken to a screen that displays all of your photos and videos. To initiate the transfer simply select the photo that you wish to store in your Dropbox.
Special Note: If you selected Wi-Fi only in the previous step, then your phone will upload the files once you are connected to a wireless network.
Laptop/Computer
Open up your web browser and visit Dropbox.com or click the link provided. If you haven’t already signed up, click “sign up” and follow the instructions there. Otherwise, click the link that says “download,” located on the top right corner of the website. Once there you will be given instructions for downloading and installing Dropbox.
Once you have installed Dropbox a folder will be created under your user profile that will give you access to your files. For Windows users, click the Dropbox icon located on the task bar next to the clock. If you are on a Mac, the Dropbox folder can be accessed by clicking the Dropbox icon located on the menu bar, next to the clock. Your Dropbox account will appear as though it were a regular file folder on your computer.
Conclusion and Things to Remember
Remember the fundamentals to what was discussed. The cloud is a storage space that is off-site and can be accessed by different devices. It goes without saying that there is an inherent risk of your private information being intercepted. To keep your data safe remember not to share your password to your Dropbox account, refrain from connecting to unidentified wireless networks, and when in doubt never store anything in the cloud that would compromise you in any way whatsoever. Keeping this tidbit of advice in mind, have fun using the cloud. Please comment on this post if you have any follow up questions or comments.
Leave a Reply